Congratulations! You have carefully crafted your Blackboard course and are feeling ready to make it available to students. This short guide will talk through a number of final ‘pre-flight‘ checks for you to conduct before teaching begins. By the end of reading this guide you should be able to get your Blackboard course ready for teaching, and be prepared for some of the ‘gotchas’ that can come with the start of the academic year.
Check The ‘Class Register’; Are Your Students Enrolled?
Providing that your Blackboard course is aligned to a taught (or coded) module, students should be enrolled automatically through an integration with the student record system – but it’s always good to check!
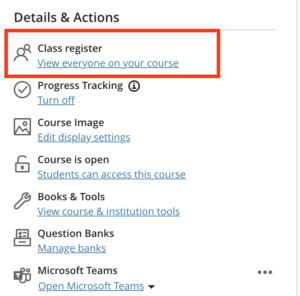
Within your course, click on ‘View The Class Register‘ option within the ‘Details and Actions‘ left-hand menu. Here you can view and search through the students and colleagues enrolled upon your course, or if required, enrol additional colleagues.
Setting a Primary Instructor
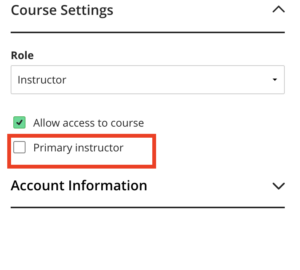
This may be a good time to set a primary instructor for your course (typically this would be the Module Convener). This helps students to identify who is leading the module from the class register more easily.
It is good practice to only provide teaching staff with the ‘Instructor’ role. Non-teaching staff are added with the Module Administrator role. You can find out more about the course roles at Durham here.
What do I do if I notice that some students are missing?
In the event that there are students missing from your Course, contact the CIS Service Desk, who will be able to investigate whether a student’s enrolments in Blackboard correctly reflect their student record.
Removing Staff from the Course
To remove a staff member from a Blackboard course – change their “role” from Instructor or Module Administrator to that of Student. A delete option will then appear allowing their removal.
Be careful when removing users from a Blackboard Course. This will permanently remove any associations with the course, such as assignment submissions and posts in Discussion Boards and Journals. If you wish to remove a student from a course, please contact the CIS Service Desk in the first instance.
Use Student Preview Mode; will students see what they need to see?
It is good practice to double check your Blackboard course using Student Preview mode to make sure that the content that you want your students to see is visible, and also that the content that you don’t want them to see is hidden. This can be difficult to spot at a glance in a Blackboard course that uses Learning Modules with nested Folders and Documents.

When you exit Student preview mode you will be given an option to “Save Student Preview User and its data” or “Delete Student Preview User and its data”. If you save this data, then this preview student will appear in your class register and submissions and also in the Gradebook.
Saving it can be useful when testing out advanced settings, but normally we recommend just deleting the data after each use.
Good Housekeeping
Your Department has determined a template for your Blackboard course which provides a degree of structure and scaffolding. Student feedback has demonstrated the value in ensuring consistency across programmes, Departments and subject areas where possible. Whilst there may be genuine pedagogic and logistical reasons for why you may need to deviate from the structure provided in your template, you should take care to ensure that your course is clean and uncluttered.
Updating a Rolled Over Course?
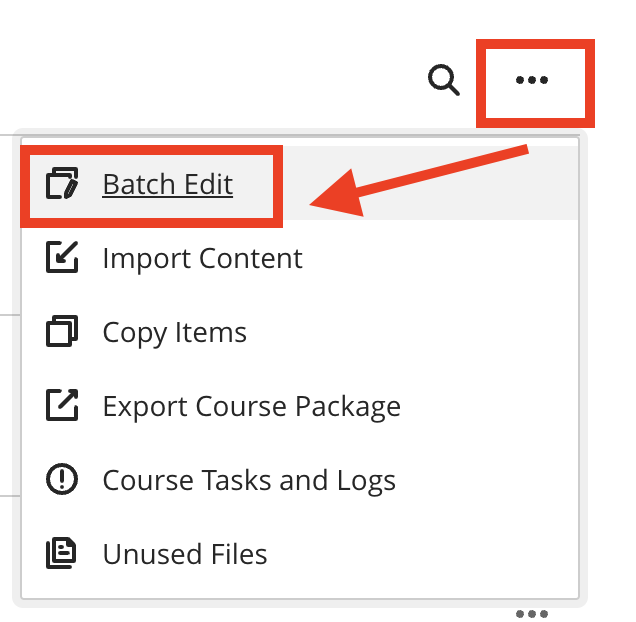
If you realise that you have multiple pieces of content which are incorrectly hidden from students, lots of old items that you want to delete, or you want to change the dates of assessments and content release dates en masse, you can use the ‘Batch Edit’ option to save you having to traipse through content and make large numbers of clicks.
Run An Ally Course Report To Check For Possible Accessibility issues.
Before releasing your Blackboard course to students, it is strongly advises that you run a Course Accessibility Report using Blackboard Ally.
Ally is integrated with every course in Blackboard, and provides helpful guidance when you upload materials such as PowerPoint slides or images as to how you can improve on accessibility. You can read more about Ally here.
Will my students see this?
Students aren’t able to see either the Ally Course Accessibility Report of the ‘gauge’ icons next to files that you upload. Students interact with Ally in a different way. Find out more about how students can access alternative formats here.
My documents are perfectly accessible – why isn’t my score 100%?
Blackboard Ally is an automated tool. It is very effective in spotting simple issues in files – such as missing headings – but it isn’t perfect. Sometimes it can over-sensitive and find contrast issues (insufficient difference between the foreground text and background colour in materials) where this isn’t strictly the case. Treat your Ally score as a guide and not somewhere where you must always score 100%
Switch on ‘Progress Tracking’
Before teaching begins, it is useful to switch on ‘Progress Tracking‘ for your course. This means that data will be collected from the start about how students are accessing your materials and your course student activity reports will be more representative over time.
To turn on Progress Tracking, click on the text in the left ‘Details and Actions‘ Menu.
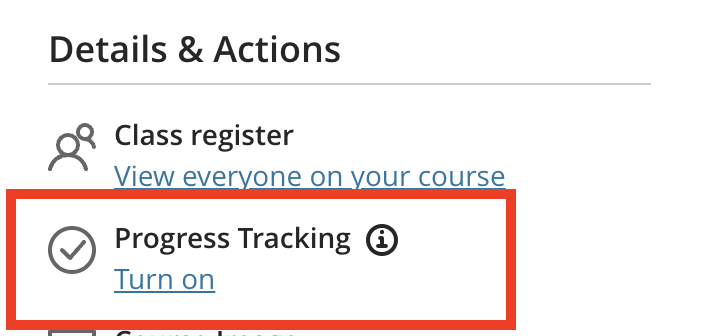
You can switch on Progress Tracking at a later date, but it won’t display retrospective information.
You can find out more about Progress Tracking on Anthology’s documentation pages.
Check the Gradebook to ensure ‘Automatic Zeros’ and ‘Course Activity Notifications’ are not switched on.
Automatic Zeros is a feature of the Blackboard gradebook which allocates students a ‘0’ mark when they fail to submit work by the deadline of a given assignment or test. This is a slightly troublesome setting that many people do not realise is turned on.
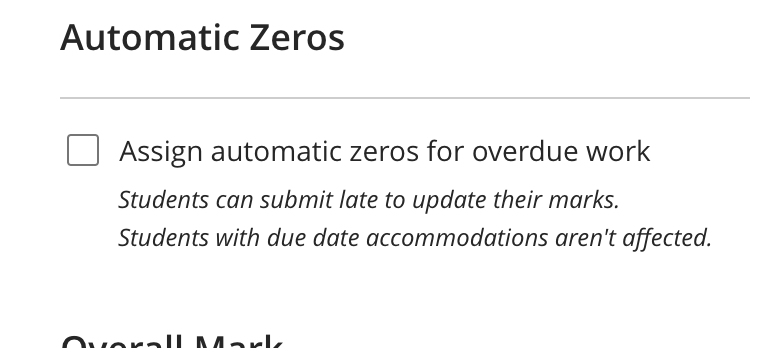
In theory this makes perfect sense and represents the reality of a student failing to submit work, but in practice this doesn’t quite match up to the way that the VLE is used to administer digital assessments and the complexities of students having extensions.
We advise that it’s best to turn automatic zeros off in your course, to avoid situations where students may become anxious at seeing a ‘0’ in their ‘My Marks‘ page in the event that they fail to submit, even with an approved extension.
To disable this setting, enter your course’s Gradebook page and select the ‘Settings‘ cog icon. Scroll to disable the option under Automatic Zeros.

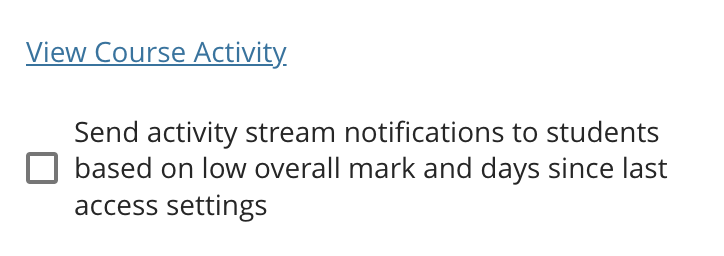
While you’re in the gradebook settings, we advise making sure that ‘Course Activity Notifications‘ are also switched to ‘Off’. Again, another good idea in theory, but in practice this could mean that your students are notified for not accessing your Blackboard Course when they have progressed to the next year of their studies, but still remain enrolled upon it for reference purposes.
Add Descriptions For Your Learning Modules, Folders & Content
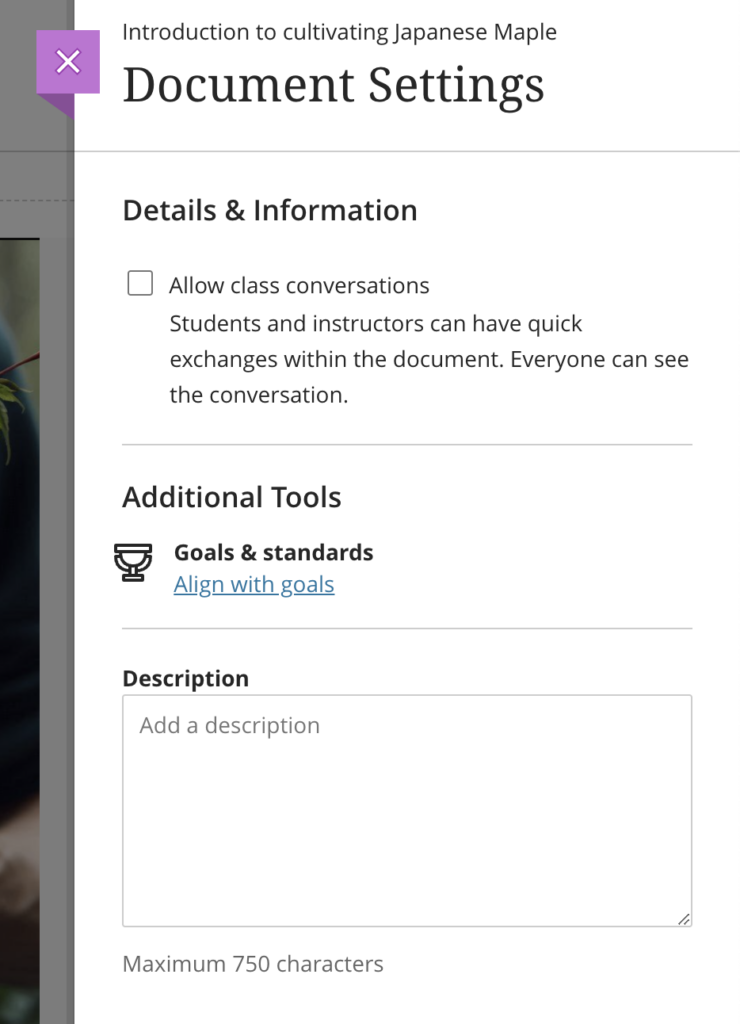
Adding Descriptions to the things within your blackboarc course is a small change that can make a big difference. It will make your course easier to navigate at a glance from the top level and it is also highly beneficial for learners who make use of assistive technologies such as screen readers.
To add a Description to an item, click on the Settings ‘Cog‘ icon within a content item or tool and enter a description. For Learning Modules and Folders, hover over the item and click on the Edit ‘Pen’ icon.
Populate The Course Calendar With Dates For Teaching Activities
The Course Calendar is a feature which allows you to provide students with information about teaching encounters, such as lectures and seminars, office hours, or landmarks within the module, such as the start of each term. When you create an activity in your course with a deadline (such as an Assignment, Test or graded Discussion Board) these will automatically be populated within your Course Calendar.
Check Your Reading List
If you haven’t already, ensure that you are linking to your Talis Aspire Reading List, and that your Blackboard course is pointing to the correct instance of the list (for instance, 2024/25, as opposed to 2023/24)
If you don’t have a link to your reading list in your course, click on the ‘+’ icon anywhere in your main course content, select ‘Content Market‘ and choose ‘Reading Lists‘ with the ‘Talis’ logo.
Make Your Course ‘Open’ To Students
When you feel that you are ready to go, it’s time to make your course ‘Open‘ to students. By default, your course should be ‘Private‘. This means that students cannot see your course while you are developing materials and fleshing it out.

In the left hand ‘Details and Actions‘ menu, select ‘Course is private‘ and select ‘Open to students‘
It can generate a degree of anxiety when a student sees that some, but not all, of their modules are available. It is good practice to coordinate the release of courses across Programmes where possible.
Completing Your Course?
Not just yet!
After the academic year is over and any resit activity has completed within your course, you can ‘complete’ the course to put it into a ‘read only’ mode. This means that students will be able to review and retrieve content from the course, but they will not be able to add new interactions into tools such as Discussion Boards.
Be careful when completing your course. Ensure that no students have any remaining extensions and you do not have students currently on a leave of absence (LOA) from their studies. They may need to interact with the course again in future in order to complete assignments.
Let Students Know The Course Is Open: Schedule An Announcement
It is good practice to announce the release of your course to students at the start of term.
Blackboard provides you with two mechanisms for doing this: Course Announcements and Course Messages.
Both of these options can be targeted at your whole cohort and can be configured to be sent as an email to students.
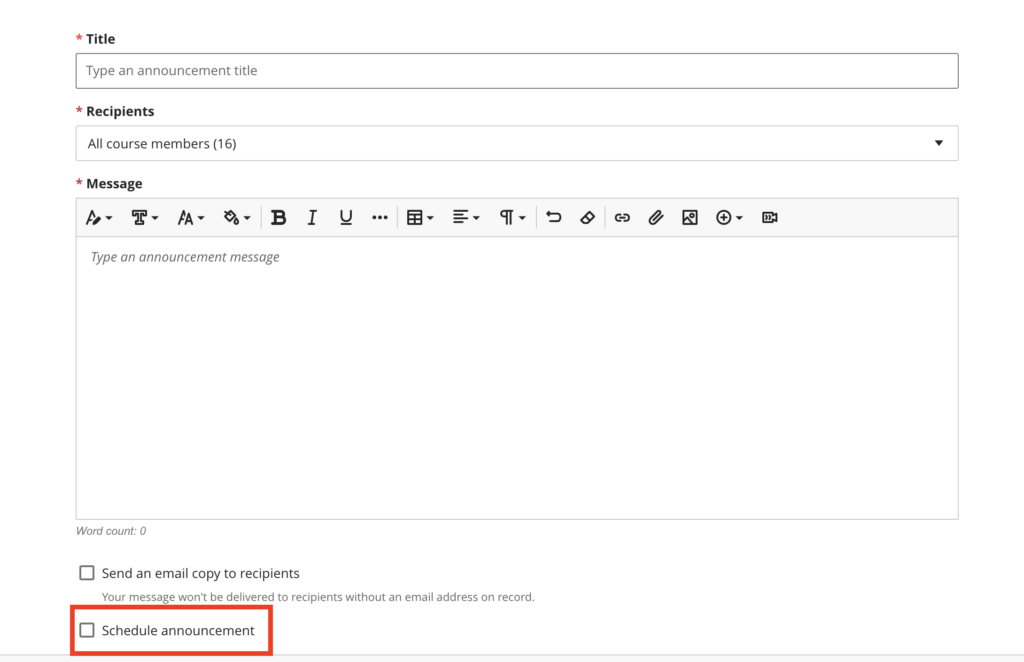
Course Announcements
When you create an Announcement it will appear as a pop-up when students enter into your Blackboard course.
Course Messages
Students will be notified of new Course Messages when they log into Blackoard. The base navigation contains a ‘Messages‘ option which flags unread notifications
We Have Lift Off! Is There Anything Else I Should Look Out For?
Class Conversations
An underused feature in Blackboard is ‘Class Conversation‘. These can be switched on for most pieces of content, such as Blackboard Documents, Tests and Assignments. This feature allows students to have in-context discussions around a teaching material or activity – and could be encouraged to develop organically, or could be designed as part of a scaffolded activity. When releasing your course, it might be worth looking back through your content and thinking about areas where switching on Class Conversations could be relevant, and signposting students towards this feature.
Common ‘Gotchas’
Teething issues are annoying, but unfortunately are quite normal at the start of the academic year. Even if you’re super prepared it’s not always straight forward to premeditate for every eventuality; listed below are a number of common ‘gotchas‘ with some advice on how to unpick them, should they arise.
I’m getting ‘Access Request’ emails for my Encore/Panopto videos. What do I do?
Check the video in question – where is it uploaded? The chances are that your video is stored in your ‘My Folder’.
There are two ways to embed a Panopto video into your Blackboard course. One is by pasting the ’embed’ code into a HTML content item, and the other is to use the ‘Insert/Edit LTI Item‘ embed option within the text editor. We recommend that you use the latter, as it performs a degree of high wizardry that ensures that your students are able to engage with whichever videos you embed regardless of where they are stored in Panopto.
My Lecture was recorded by Encore and me and my students can’t find it. Where is my Encore Recordings folder?
The third-party tools that plug into the system, such as Panopto, are, however, located at different parts of the interface. You can find the ‘Encore Recordings‘ folder associated with your module in the ‘Details and Actions‘ menu as shown below.
Last updated: