This guide will outline:
- the differences, benefits and relative suitability of Learning Modules and Folders;
- how to create Learning Modules, Folders and Documents.
- how you can organise content and activities within Blackboard using Learning Modules, Folders and Documents;
You must include a ‘Start Here’ Learning Module as the first item in your Course. This should include key information such as the module outline. This is a Blackboard Minimum Standard.
Learning Modules and Folders
Providing a coherent and consistent structure for your Blackboard Course is not only good practice for keeping things tidy, but it may be essential for students who use assistive technologies to navigate and access materials. For reference, see the Minimum Standards for Blackboard in the Durham Learning and Teaching Handbook [Internal SharePoint page, Durham University Login Required]. opens a new window
Learning Modules and Folders in Blackboard are ways to collect or organise items and materials, such as Blackboard Documents. You can add Release Conditions (see Anthology’s Blackboard Guide on Release Conditions opens a new window) to individual Documents or items, as well as the overarching Folder or Learning Module. When you put release conditions on a Folder or Learning Module, the items within them are also hidden/made available under the same conditions.
Learning Modules are designed to be arranged or engaged with in some form of order. For instance, for a given topic, you might want to include a pre-seminar reading, followed by supplementary materials from your seminar, followed by a post-task or a series of signposts. See Anthology’s guidance on Learning Modules opens a new window.
Learning Modules appear slightly differently within the Blackboard interface than Folders and come with additional features, such as the ability to:
- add a thumbnail
- enforce a ‘Sequence‘ so that students must engage with the content in the order that it is presented within the Learning Module
Should I use Learning Modules or Folders?
If Learning Modules and Folders are so functionally similar, then does it matter which one I choose?
- For maximum flexibility and the best student experience, we advise that Learning Modules are used at the top level of the module to encapsulate blocks of associated content (e.g. a week, unit, topic or ‘phase’ of learning).
- Folders are best used to add an additional layer of organisation within a Learning Module, or to house connected materials that do not need to be accessed sequentially (e.g. assignment briefs and submission points.)
For example, you may use a Folder to collect information pertaining to assignment submission for the module, whereas you may use a Learning Modules are used to group learning and teaching materials by topic/unit/phase of learning.
Creating a Learning Module
Within your Blackboard Course:
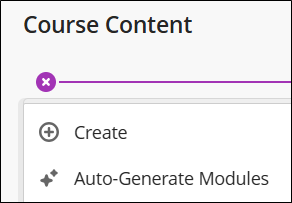
- Hover over anywhere within the ‘Course Content‘ section and click on the ‘+‘ icon and select ‘Create‘
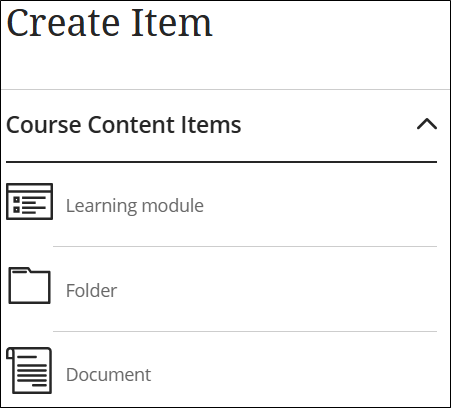
- Select ‘Learning Module‘ from the list.
- Enter a Name and a plain text Description for your Learning Module which outlines clearly what it will contain.
- add a thumbnail image (optional) to your Learning Module by scrolling to the bottom of the options menu and selecting ‘Add Image’.
- Select ‘Save‘
Enforcing a sequence
You can enforce a Sequence on a Learning Module to make students engage with material in the order that you present it in (for instance, if you wanted your students to view the pre-seminar reading before viewing the seminar materials).
To enforce a Sequence on a Learning Module
- Select the elipses (…) next to your Learning Module
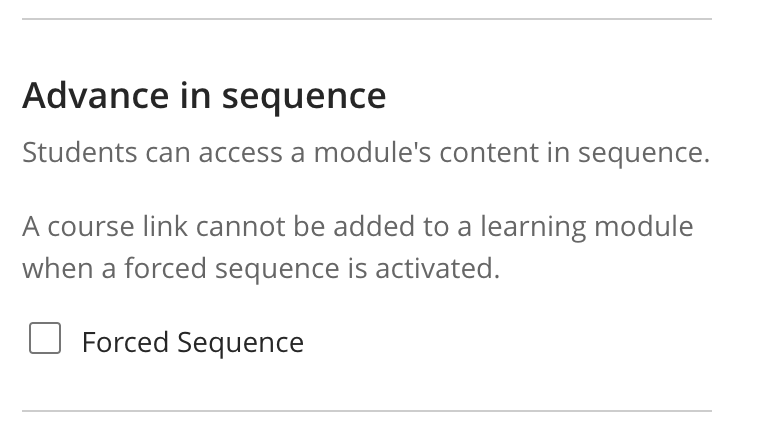
- In the right-hand pane window, scroll down to ‘Advance in Sequence‘
- Select ‘Forced Sequence‘
- Press Save.
Creating a Folder
Within your Blackboard Course:
- select ‘+‘ icon and select ‘Create‘.
- Select ‘Folder‘
- Enter a Name and a plain text Description for your Folder which outlines what it will contain.
- Select Save

For more information, see Anthology’s Blackboard guidance on Folders opens a new window.
Documents
A ‘Document’ in Blackboard is a blank canvas that you can include a collection of materials such as text, images, embedded videos from Panopto, attached files – such a Microsoft Word Documents and Powerpoint Presentations – and customised HTML. Documents are modular, meaning that you can add multiple items and re-arrange them at a later point in time.
You can embed multiple documents within a Folder and Learning Module to add structure.
Creating a Document
Within your Blackboard Course
- click on the ‘+‘ icon and select ‘Create‘
- Select ‘Document‘
- Enter a Name and a plain text Description for your Document which outlines what it will contain
- Press Save
For more information, see Anthology’s Blackboard Guidance on Documents. opens a new window

Adding Content to Documents
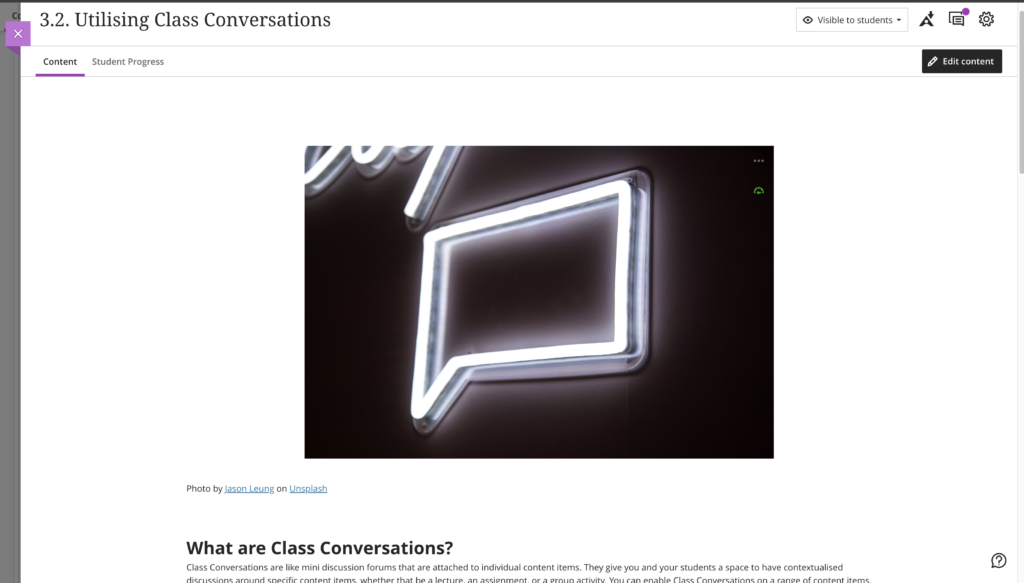
Within your Document click on the ‘Edit Content’ icon in the top right hand corner.
You can now add:
- Content to open the text box editor. Here you can add text, hyperlinks or embed videos from Panopto or Reading List items from Talis Aspire using the ‘Content Market‘
- HTML to enter custom HTML, or embed items from third party sources.
- Knowledge Check to create a simple single quiz question. You can find out more about knowledge checks here.
- File Upload to upload Documents, PDFs, PowerPoint Presentations or Images from your harddrive.
- Cloud Upload to browse for files in your Durham University One Drive account.
- Content Collection to re-use content that you have already uploaded to your Blackboard Course
- Image enables you to upload your own images, select images from Unsplash or use the AI Design Assistant to generate images.
- Audio/Video enables you to upload your own video and audio files or record audio or video from within Blackboard.
- Convert a File to produce an alternative format of a file using Blackboard Ally. You can find out more information about alternative formats here.

Adding Text and Files to a Document
The document acts in a similar way to a web page, you can add text and images, embed videos and attach files such as Word documents, PDFs and Excel spreadsheets. You may include several documents within the folder or learning module which builds into a sequence of information and activities to enhance the learning.
To add text to a document:
- Open the document.
- Click Edit Content to activate the text editor.
- Hover over a block of existing text and select the purple ‘pen‘ icon.
- Type directly into the text editor, basic editing tools are displayed along the top of the text editor.
- Click Save when the editing is complete.
To add a hyperlink to a document:
- In the text editor, select the text you would like to use as the link.
- Click the Hyperlink button on the toolbar.
- Paste in the URL (web address) and click Insert.
To add a file as an attachment, e.g. Word Document, PDF, JPG, MPEG file within a document:
- In the text editor, place the cursor where the document is to be displayed.
- Click the Attach button on the toolbar.
- In the Browse window, navigate to the file, select it and then click Insert.
- Note: Images will be displayed at their actual dimensions, you will need to edit these files to be a viewable size before attaching. Images which are larger than the width of the screen will be shrunk to fit.
To add an image or media file:
- Select the ‘image’ icon from the text editor toolbar.
- Select the type of content, e.g. Image from the internet.
- Paste in the URL and type in Alt text.
- Click Save.

To upload a file to the document:
- Click the plus sign, select Upload from computer.
- Select the file from the browse window.
- The file will then be uploaded.
- Set the access to the document, this can be View and download, View only, Download only.
- Click Save.
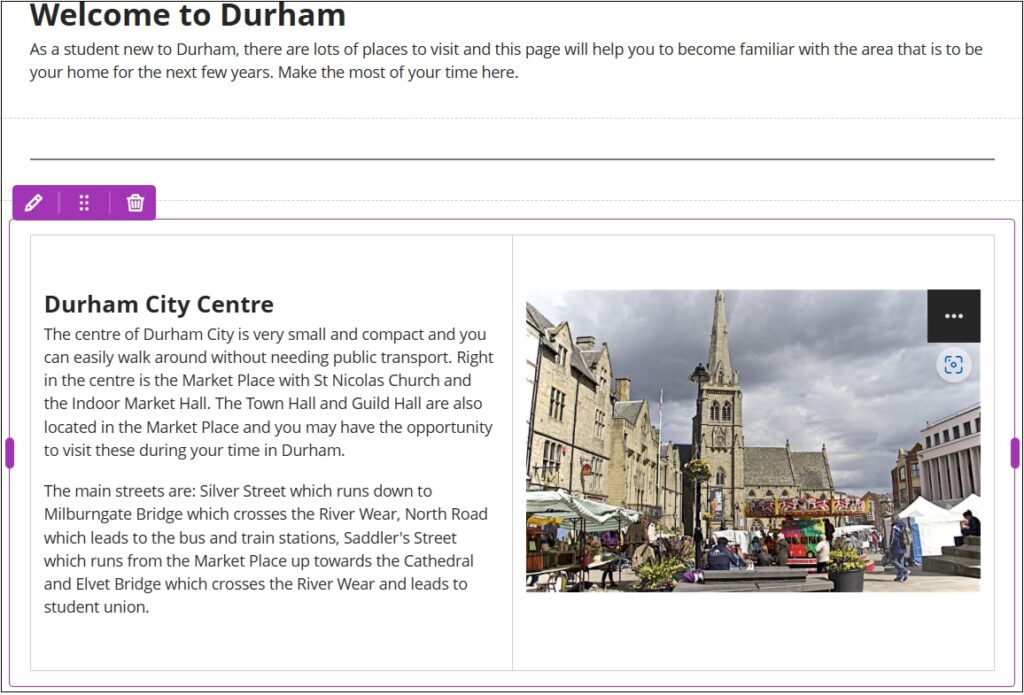
Dividers have been included so that you can present the content in a segmented way with a line between each section.
To add a divider:
- In the document, click on the + sign in the place where you wish to place the divider.
- Select the divider and this will be placed across the document.
The divider can be edited by clicking on the 6 dots. The divider can be indented from the left or right or moved using this option.
Printing Documents
This new option allows users to:
- Physically archive content
- Review content offline
- Share content with students or peers
A print button has been added to the top right-hand corner of the document. Click the button to launch the print dialog box. Select options and print.
When printing from a mobile device, the Document prints as displayed on a desktop web browser.
Depending on the size of some content (for example, images), items may shift to the next page depending on the page layout and scale.
Knowledge Check Questions
Knowledge check questions are single multiple choice questions which can be inserted into documents to check progress. These can be inserted from the document features list above. Further information on setting up knowledge check questions.
Adding Content from the Content Collection
The Content Collection is a storage area where you can upload files related to the course. These files can then used when creating learning modules and can be inserted into documents.
To upload content to the Content Collection:
- On the main menu on the left of Blackboard, select Tools and then select the Content Collection icon.
- There will be folders for each of your courses, select the folder for the relevant module from the list.
- If you wish to organise your files in folders, click New Folder, give the new folder a name and then select the folder.
- Click the Upload button and select either Files or Zipped Folder.
- Navigate the Browse window to select your files, then click Submit. The files will then be uploaded to the folder.
When you embed a video from Panopto, use the ‘Content Market‘ embed option instead of using a HTML embed code. The ‘LTI embed‘ method means that there won’t be any unforeseen issues with students having permission errors when trying to view videos. When you use the HTML embed method and your Course rolls over, students may get ‘Access Denied‘ errors.
Do not create a Turnitin Submission Box within a Document. This will not function correctly and it will not create a GradeBook column.
Make the Content Available
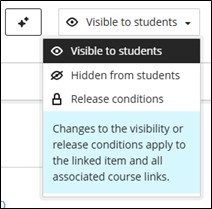
Finally, make the content available to the students.
This can be done from within the learning content item, the settings are at the top right.
The content visibility can also be set from the main content screen, the settings are below the title.

Remember, you can add Release Conditions (see Anthology’s Blackboard Guide on Release Conditions opens a new window) to individual Documents or items, as well as the overarching Folder or Learning Module. When you put release conditions on a Folder or Learning Module, the items within them are also hidden/made available under the same conditions.
